Can You Use InDesign on a Macbook Air?

Can You Use InDesign on a Macbook Air?

Adobe InDesign is a powerful graphic design tool. If you have a Macbook Air as a laptop and want to use Adobe InDesign on it, you might wonder – can a MacBook Air run Adobe Illustrator? Is the device powerful enough to use the software smoothly?

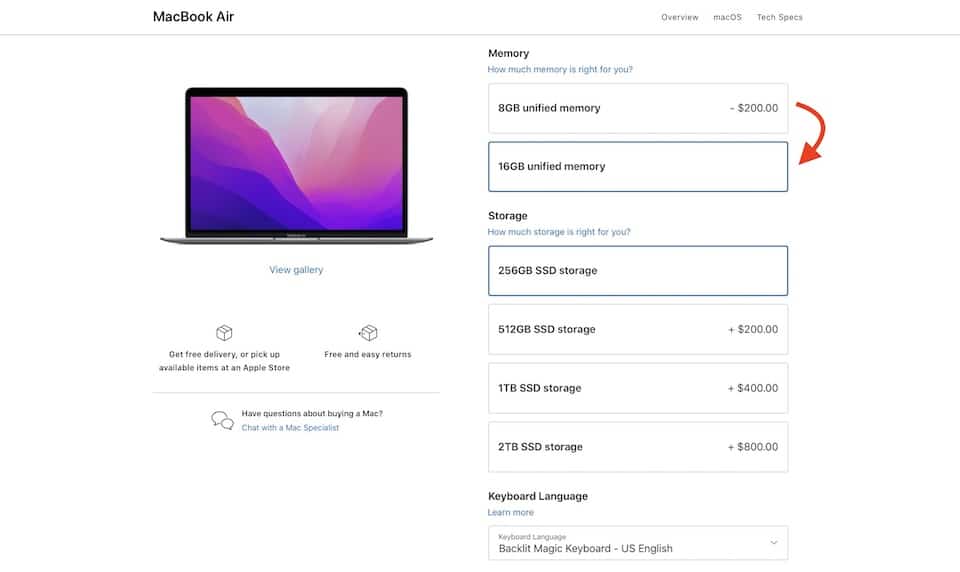
All MacBook Air models can run Adobe InDesign, however 2020 or newer MacBook Air models will perform best due to their more powerful M1 processor chip. For the best performance, consider upgrading the built-in Memory from 8GB to 16GB.

If you want to learn more about using Adobe InDesign on the Macbook Air, you’ve come to the right place. Read on to learn more about how this program works on the Air, which Macbook is best for InDesign, and more. There’s a lot to cover, so let’s get going!

How Does InDesign Work on a Macbook Air?

If you want to take advantage of Adobe InDesign on your Macbook Air, you will need to follow a few steps ahead of time. It doesn’t come pre-downloaded on the system. Let’s dive into the process that will permit you to download Adobe InDesign on your Macbook Air.

To get Adobe InDesign on your Macbook Air, you should:

  1. Go to the Adobe website
  2. Invest in Adobe InDesign or the entire Adobe Suite
  3. Download Adobe InDesign
  4. Log in with your personal information

Now, you can take advantage of all that Adobe InDesign offers.

It might take a moment for Adobe InDesign to boot up, but once it does, you should have no trouble working with the program on your Macbook Air. The laptop can handle the program – but is the Macbook Air the best for InDesign?

Which MacBook is Best for InDesign?

There are tons of Apple products on the market and many Macbook choices. The Air is just one of many. With so many options, is the Macbook Air the best selection for InDesign? What other choices do you have?

Although InDesign will run on any year MacBook Air, the 2020 or newer MacBook Air models are best to run InDesign because they come with the M1 processor chip.

The M1 processor chip is a lot faster than the previous processors, so you’ll have a more enjoyable experience using InDesign.

If you plan to use Adobe InDesign more frequently, you may want to consider upgrading the 8GB of built-in Memory to 16GB.

MacBook Air vs MacBook Pro for Adobe InDesign

Although the MacBook Air is less powerful than the MacBook Pro, it’s also less expensive by hundreds of dollars. The MacBook Air is a solid option if you want to make Adobe InDesign a part of your life, especially if you’re buying a 2020 or newer model with the M1 chip.

A 2020 or newer MacBook Air will perform nearly identical to the MacBook Pro when it comes to running Adobe InDesign.

It is not necessary to upgrade computers from MacBook Air to MacBook Pro in regards to using Adobe InDesign.

Do Professionals Use MacBook Airs for InDesign?

Because MacBook Airs are so powerful nowadays, there are plenty of professionals that use MacBook Airs for professional purposes. Illustrators and graphic designers enjoy the portability of the MacBook Air, along with the storage space it provides for such a small laptop. You can absolutely use the MacBook Air for InDesign, whether you work from home or in an office.

In the past, professionals were more likely to opt for the MacBook Pro because it was more powerful, however the 2020 and newer models of the MacBook Air harness the same M1 processor chip that makes it just as powerful.

Is InDesign Free on the MacBook Air?

Free software would be nice, but Adobe InDesign is a complex software that comes at a premium. Before you get started, you need to enroll in a subscription plan for the software. Let’s talk about your options if you need the InDesign software.

If you want Adobe InDesign, you have three subscriptions options to select from:

  • A free trial: Adobe offers a 30-day trial of their services for any interested party. At the end of this time frame, you can determine if the service is something you want in your life.
  • A basic subscription: If you want to pay for Adobe InDesign, you can expect to hand over around $20.99 a month. It’s not cheap.
  • A student account: Your school might already offer free Adobe features. Even if they don’t, you can get up to 60% off of your subscription.

You can determine which subscription choice is the best for your life and work from there.

It’s vital to determine if you can afford Adobe InDesign before putting money into the investment. At $20 a month, you can expect to pay almost $250 a year for the software. Unless you’re getting a return on that investment, it’s not worth it unless you have a significant sum of money under your belt. The choice is yours.

Are There InDesign Alternatives for the Macbook Air?

Adobe InDesign is a great graphic design software, but it might not be the best option for your needs. If this is the case for you, you might wonder – are there any alternatives to Adobe InDesign that are more practical for the average person? Let’s discuss some of the best secondary choices available on the Macbook Air.

Some of the best alternatives for InDesign on the Macbook Air include the following:

  • Placeit (my personal favorite, user-friendly)
  • Affinity Publisher
  • VivaDesigner
  • Xara Page & Layout Designer 11
  • QuarkXPress

These will give you similar abilities at a different price point.

Many of these options provide price points that are cheaper than investing in InDesign for your Macbook Air. You can test each one out and determine which service is best for you. If none have the same appeal as Adobe InDesign, you can always go back to the original. 

Conclusion

If you have a Macbook Air and want to know if it can handle Adobe InDesign, you can feel comfortable knowing the device is capable of it. You can take your Macbook Air with you and feel confident that you will be able to use Adobe InDesign, no matter where you might be.

If you find yourself needing a less resource-heavy editing software, consider online image editors like Placeit.net. They are hosted on the internet so they require very little resources, and can even be used on a smartphone or tablet if needed.

Can You Get Sued for Using a Font You Didn’t Pay For?

Perhaps you’re in the process of creating a brand for your first business, and you want a font to put on marketing materials- a font that will distinguish your business from your competitors. Something that is all your own. You go onto a font website and find a font that speaks to the personality of your brand and the type of consumer you want to attract, and download it for free. Before you use the font, it is critical to determine what licensing is associated with the font.

You can get sued for using a font you didn’t pay for if the way you use it violates the font licensing. Just because a font is free does not mean you can use it in whatever way you want. You can only use it according to its licensing.

Consider using a graphic design software with all copyright-free graphics and fonts, like Placeit.net, to be sure you are creating a design that is 100% copyright-free.

If you’ve found a font you’ve fallen in love with or have already downloaded a font you love, make sure you find out if it is copyrighted. If so, find out precisely what kind of licensing is on the font to ensure you will not be violating copyright law. There are several ways to accomplish this if you don’t know how.

How Can You Avoid Getting Sued for Using a Font You Didn’t Purchase?

When creating a design for a T-shirt, business card, or other promotional material for your brand, there are several elements to consider, including color scheme, graphics, and font. Once you’ve worked hard putting together the look of your design, the last thing you want to deal with is having to start over again or worse: being sued for misusing a font you didn’t purchase.

In order to avoid any possible litigation, here are a few ways to ensure you have rights of use:

  1. Find the copyright
  2. Find the license type
  3. Make a purchase

Let’s go over each of these steps to better understand how to avoid legal entanglements when using free fonts.

1. Find the Copyright

Once you have found the font you want to use and are about to download it or have already done so, make sure that you find out if the font is copyrighted. Unfortunately, not every website that pulls up on your Google search engine is trustworthy. There are several lesser-known font websites that illegally upload fonts without regard for their copyright. Make sure the site you’re using to find your font is legitimate.

There are several ways you can find the copyright of a font. The simplest is to look at the download .zip folder of the font and find the text document with the licensing information. Typically, these text documents will appear as license.txt or readme.txt. Another hassle-free way is to look on the website where you got the font. There should be information on the usage rights on the page where you downloaded the font.

As a last resort, you can always do an image search online by simply uploading the font and allowing the website to check the image against its database for a match. If you do this, be sure that the font is in black text with a plain white background and no other detail on the image. You can also do a Google search of the name of the font, but this comes with its own risks; as stated before, there are many fraudulent websites with copyright fonts that are being touted as free.

2. Find the License Type

Once you know if an image is copyrighted, it’s critical to know what type of licensing it has and how that pertains to your use of the font. There are three license types: for personal use, for personal and commercial use, and requires purchase. The safest bet for licensing is selecting a font that allows for commercial use.

If you come across a font that is free for personal use, then you cannot use it commercially, which means that it can’t be on any products, marketing materials, business promotions, etc. The danger here is you can create a fun design that you share strictly among friends that ends up on a T-shirt or some other product, and it crosses that line. Once that line has been crossed, you are in violation of copyright, and you run the risk of being sued.

Don’t be fooled by a font because it says it’s free. Many free fonts on the internet have restrictions on their use, and if you don’t educate yourself, you could end up with a lawsuit on your hands.

3. Make a Purchase

Some licenses require that you make a purchase from the copyright holder to use the font. Each copyright holder will have different stipulations on how the font can be used once it has been purchased. Make sure you know those details, as the purchase may only be for single-use.

Again, just because a font is free to download for personal use does not mean you can use it commercially. In some cases, you can purchase the rights to use it commercially, and in others, that may not be an option. It’s critical to know all the facts about the licensing to avoid any legal consequences.

If you want to take the guesswork out of this whole process, you can always use a website like Placeit.net that allows you to design your logos, graphics, and products using their copyright-free design elements, including fonts. That way, you have peace of mind that doesn’t involve hunting down information.

Conclusion

Whether free or purchased, fonts have licensing or terms on which they can be used. Know the licensing information so you can use the front properly and avoid a lawsuit for copyright infringement or unlicensed use.

If you are not able to locate the copyright or licensing information for a font, then the best practice is to let it go and find something else to use instead. Don’t take the risk and end up getting served with lawsuit papers.

Can You Put an Ad for Your Business Outside Your House?

Owning a small business is an exciting venture and one that requires a lot of energy and resources. Even if you’re lucky enough to secure grants to help your business develop and grow, upfront costs can still add up well above what might have been originally budgeted. Therefore, you need to pinch every penny you have, especially when advertising your business to the public.

In general, you can place a yard sign ad for your business outside your home. However, every state and even city ordinance is different regarding yard signs or signage of any kind on public or private property. It’s best to check with your local government, and home owners association, to determine those rules and regulations for signage.

Billboards and ads in the newspaper or a magazine can undoubtedly put a dent in your wallet. A simpler and more cost-effective option could be to put a yard sign ad for your business outside your home, but what are the legalities? Let’s look at what criteria you may consider when developing an ad sign to place outside your home.

What are the Rules and Regulations for Putting An Ad for Your Business Outside Your Home?

Again, it cannot be stressed enough that any rules and regulations your city may have on ads or signage outside your home are based on city ordinances. The great thing about that is that a simple search engine inquiry, and all that information can be accessed. It may differ slightly from state to state or city to city, but typically you will come across similar overall criteria.

Here are some factors you will want to consider when creating an ad for your business to be placed outside your home:

  1. Private property versus rented property
  2. Size of the sign
  3. Placement of the sign
  4. Safety

Let’s delve deeper into each topic to understand what kind of ad signage is appropriate.

1. Private Property Versus Rented Property

Most cities will have different rules regarding signs or advertisements based on if the property you are placing them on is rented or private. Most residents are private property, so homing in on that (no pun intended), you can place an ad outside your home if you have the consent of the person or persons who own the property.

Consent is necessary if you are renting a home or apartment. If you are renting a home, it takes a simple call or email to your landlord to ask permission to place an ad outside the home, according to city ordinances. If you do not request authorization, the homeowner has the right to take down the advertisement at any time and without notice. If you have a homeowner’s association your property is a part of, you may also have to contend with their rules and regulations.

Similar to renting a home, if you rent an apartment, your building may have specific rules for what can or cannot hang outside your door, be it in the hallway of the building or outside your window. This information can typically be found in your lease agreement, but contact the company that owns the property and request permission when in doubt. Again, the building owners have the right to remove or request the removal of any signage that has not been approved. If any consequences were laid out in your lease agreement, they might also impose fines.

2. Size of the Sign

The sizing of your sign that is permissible may be different from state to state or city to city. Check your local government ordinances to determine the size limitations before creating your sign on a site like Placeit.net. Typically, there is no regulation for a minimum size, but there will be a cap on maximum size.

Seattle, for example, states that a sign may not exceed eight feet in surface area. More specifically, the sign can be no more than 36 inches in height (measured from the street or driveway) and no more than 24 inches in height (measured from the street or driveway) if it is located within 30 feet of an intersection. It’s crucial to abide by these restrictions to avoid citations from the city.

3. Placement of the Sign

Once you look up your city ordinances on signage on private property, it will likely dictate the sign’s approved placement(s) outside your home. Referring to yard signs specifically, the majority of the time, the regulations will say that signs are to be placed in the planting strip of your property. Regulations may dictate a different placement if you want to get more creative and create a flag advertisement.

There are also criteria for how you place the sign. For a flag, they may require that you pose it in a stationary flagstaff on your home. In the case of a yard sign, they may have restrictions on how deep you can place the support stakes. In Seattle, for example, the support stakes may go no deeper than one foot into the ground.

4. Safety

One of the biggest concerns for ad signage and why there are regulations on size and placement is safety. Now, you may be wondering how a simple ad sign could present any risks of danger, but be assured, the rules are there for a reason. Most regulations will request that any signage you place outside your home must not obstruct pedestrian mobility or interfere with traffic mobility.

Pedestrian mobility means that individuals should be able to walk by your home or up to your front door without a sign encroaching their path. Sign placement is especially poignant at night when pedestrians have less visibility to see the sign. Traffic mobility means that vehicles and other modes of transportation must be able to pass your property without your sign interfering in their ability to see traffic lights or signs or their ability to maneuver about on the street or up and down your driveway.

Conclusion

In the end, it is worth a couple of minutes of research to find out what your city allows in order for you to take advantage of this inexpensive method of advertising your business. Be sure to get all parties involved, including owners and home associations, to avoid penalties.

Can You Put Banner Ads in an Email? [Facts Explained]

Creating effective email marketing templates can be a fun and challenging way to help your business grow. Email allows you to create targeted advertising campaigns based on customer interest, and you can inform your subscribers of sales, discounts, promotions, and other incentives. Successful email marketing not only informs but it gives access to your goods and services, like through a link or clickable banner.

You can put a banner ad in an email. You can incorporate banner ads into the top, middle, signature, or sidebar of your email. You can use a staple banner that advertises your brand name and logo, or you can do a special banner for discounts or promotions.

Adding a banner to your email can be an effective tool for marketing if it is done correctly. Companies who use email banners not only see an uptick in sales and leads but emails with banners are often revisited, on average 3.3 times.

How Do You Create a Good Email Banner Ad?

Banner ads are a visual expression of your brand. More than the text of an email, your subscribers will remember the elements of a banner ad. They can also provide an instant connection to your goods and services by making them clickable. Banner ads in emails are guaranteed to increase your sales and leads and see your business grow.

In order for your email banner to garner the attention and success you desire, there are a few elements you will want to include to make it outstanding:

  1. Brand Name
  2. Brand Logo
  3. Link to Your Website
  4. Product Photos

Let’s take a deeper look into each of these elements and how they can add to your email campaign.

1. Brand Name

The brand name may seem like an obvious component to add to your banner to create brand awareness. While that is true, it’s not just about adding your brand’s name but how it’s done. For example, if this will act as your standard banner, you will want the brand name to be as prominent as possible. It should be the largest text in the banner and preferably centered, so it draws the eye.

If you are creating a banner for a limited time because it is announcing a promotion or discount, then the brand name can be more discreet. You’ll want the focal point to be the percentage of the discount or the deal you’re promoting because that will drive traffic to your website.

2. Brand Logo

Nowadays, there is a mix of brand names that are the company logo and companies that have a logo separate from the brand name. If you fall into the first category, you have already fed two birds with one scone, and you can move on to the next element. If your logo is separate, placing it in the email banner will increase brand awareness.

Your established branding will determine placement, and it should coincide with how it looks on other marketing materials like your website, ads, business cards, etc.

Banner ads are also where you would bring in your brand colors and graphics. The idea is to create a consistent brand experience across the board.

3. Link to Your Website

Aside from your brand name, the second most important element to the banner is making it clickable. Your subscribers require ease of access to the products or services you are advertising. If you’re using a standard banner, then allowing your customer to click anywhere on the banner to go to the homepage of your website is the best approach.

If your banner advertises a special offer or a specific product, then make your click applicable to that offer or product. Instead of going to the homepage, potential customers should be directed to the sale or the promotion. A third option is giving multiple options within the banner so your customer can choose where they would like to be directed.

4. Product Photos

The universal rule is to show, not tell. Depending on how big you want your banner to be, they can be a great place to feature product photos, especially if you are promoting a new or specific product. Product photos will increase the likelihood that your subscriber will click on your banner and visit your website.

If you feel overwhelmed by having to create a banner ad from scratch, there are websites you can go to, like Placeit.net, that have thousands of pre-made banner ad templates you can customize.

Banner Email Best Practices

Now that you have an idea of how to create an eye-catching banner ad for email let’s talk about some best practices for all your email campaigns. These best practices will be a dos and don’ts to make your banner work for you and avoid some common pitfalls when utilizing banner ads for email.

  • Make sure your banner is reusable and versatile.
  • Keep the design simple. Focus on one or two features as a focal point.
  • Make your banner sizes consistent across email campaigns.
  • Customize your banner ads based on your email campaign needs.

Always keep an eye out for feedback for consumers. In fact, it would benefit your brand to request it from your subscribers via a survey. Ask them about your banner ad’s look, effectiveness, and user-friendliness, among other email campaign components. You can adjust your banner accordingly.

You can also look at the backend to see which banners get more clicks, which emails with banners get revisited, and which email campaigns produce a substantial spike in sales. Don’t forsake the analytics, and you will be able to tweak your email banner ads to allow for the most growth.

Conclusion

Overall, banner ads in emails are great tools to increase sales and leads, drive traffic to your website, and grow your business. Despite the increase in social media marketing, email has remained one of, if not the most effective marketing strategy. That direct contact with consumers who have already expressed an interest in your business is like casting a net in a pond instead of the ocean.

Can You Use a MacBook Air for Photoshop?

Adobe Photoshop is a powerful editing software that allows users to alter and change images to their liking. If you are using a MacBook Air as your device, you might wonder – can you use Adobe Photoshop on the MacBook Air, or is it incompatible?

All MacBook Air models can run Adobe Photoshop, however 2020 or newer MacBook Air models will perform best due to their more powerful M1 processor chip. For the ultimate performance, consider upgrading the built-in Memory from 8GB to 16GB.

Those looking to learn more about using Photoshop on a MacBook Air are in the right place. Read on to learn more about how the software works on the laptop, how you can get it on the Air, and more. There’s a bit to go over, so let’s get going!

How Does Photoshop Work on a MacBook Air?

If you want to use Adobe Photoshop on your MacBook Air, you’ll first need to download to the device. Adobe Photoshop does not come by default on any Apple computers.

To put Adobe Photoshop on your MacBook Air, you should:

  1. Go to the Adobe website
  2. Purchase either the Adobe Suite or Photoshop individually
  3. Download Adobe Photoshop
  4. Enter your information and log in to the program

Once you log in and have the software downloaded, you’re ready to roll.

You can put the Photoshop icon right on your home screen dock or keep it hidden and out of the way. Now that you have Photoshop downloaded on your MacBook Air, let’s go over how to use it.

Which MacBook is Best for Photoshop?

There are several different MacBook models available. Some of these offer more powerful hardware than others, but how much power do you really need to run Photoshop?

Although Photoshop will run on any year MacBook Air, 2020 or newer MacBook Air models are best to run Photoshop because they come with the M1 processor chip.

Apple’s M1 processor chip is much faster than the previous processors, so you’ll have a more enjoyable experience using Photoshop.

If you plan to use Adobe Photoshop frequently, you may want to consider upgrading the 8GB of built-in Memory to 16GB.

The upgraded Memory will keep Photoshop running fast as you create more complex design projects. Typically, the program can get “bogged down” and take more loading time if you run out of Memory. Although 8GB of Memory is sufficient, you will have much more peace of mind with 16GB Memory if you find yourself using the computer for other uses as well.

Do Professionals Use MacBook Airs?

Because MacBook Airs are so powerful nowadays, you’ll find many professional graphic designers using MacBook Airs to do their work. The devices are more than capable to handle graphic design programs like Photoshop, all while being compact and portable.

In the past, professionals were more likely to opt for the MacBook Pro because it was more powerful, however the 2020 and newer models of the MacBook Air harness the same M1 processor chip that makes it just as powerful.

Is Photoshop Free on the MacBook Air?

Adobe Photoshop doesn’t come automatically on your MacBook Air, and it’s not free. You will need to pay for the program before you download it and take advantage of the features. What are the payment options available to users? Let’s talk about a few you can invest in ford work or play.

You have these three options if you want Adobe Photoshop on your Macbook Air:

  • A free trial: On all Adobe programs, you get access to a free trial for 30 days. During this time, you can determine if Photoshop is something you want to put your money into for the future.
  • A basic subscription: A monthly subscription for Adobe Photoshop will run you about $20 a month.
  • A student account: Students get up to 60% off of a subscription, and your school might already offer the program for free. Check with your university for the best results.

Although it would be nice if Adobe Photoshop was free, there are good reasons why it’s not. The software is the industry standard for many professionals, and its ease cannot be beaten. You’ll be hard-pressed to find most of the features Adobe Photoshop offers anywhere else, on any different system.

Are There Photoshop Alternatives for the MacBook Air?

Although you might fall in love with Photoshop at first, you might later determine that it’s not the right choice for you. If this happens, you might wonder – are there any Photoshop alternatives for the MacBook Air? Let’s talk about a few.

Some of the best alternatives for Photoshop on the Macbook Air include:

  • Placeit (my personal favorite)
  • Affinity Photo
  • Sketch
  • GIMP
  • Pixelmator Pro

These will give you similar features to Photoshop.

Many of these alternatives have subscription plans that are cheaper or free, a much better deal than Photoshop. Although the Adobe program is the best of the best, these will give you similar features if you find yourself looking for something different.

Conclusion

If you have a MacBook Air and wonder what it can do, you can feel comfortable knowing the laptop is powerful enough to run Photoshop. You can take the lightweight laptop with you and open up Photoshop anywhere, whether you’re working in the middle of a train station or at the office. The 2020 or newer MacBook Air models are going to be the best choice because they have the M1 processor chip, making them more powerful than ever. For the ultimate performance, consider upgrading the built-in Memory to 16GB to power through complex design projects with the same lightning fast speed.

If you find yourself needing a less resource-heavy editing software, consider online image editors like Placeit.net. They are hosted on the internet so they require very little resources, and can even be used on a smartphone or tablet if needed.

Are Gaming Computers and Laptops Good for Photoshop?

Gaming laptops are a hardcore video game enthusiasts’ tool of choice for a high-quality, immersive gaming experience, but are gaming laptops and computers good for running Photoshop and other art-related programs?

Gaming computers and laptops are good for Photoshop because they have fast performance, high-quality graphics and resolution, and a large amount of storage for creative projects, among other things.

Devices that you can use for more than one purpose are usually a good investment. So, read on to find out why gaming computers and laptops are great for running and using Photoshop.

Can Gaming Computers and Laptops Handle Photoshop?

Gaming laptops and computers can run Photoshop well and are a wise choice for those that want a device that can do it all. The reasons why gaming laptops are suitable for Photoshop are:

  1. They are fast
  2. They have a considerable amount of storage
  3. They have high-quality graphics and screen resolution
  4. The battery is long-lasting
  5. The keyboard and touchpad have a good response rate
  6. The cooling system is effective
  7. They are durable

Let’s explore each of these points in detail to learn more about why gaming laptops and computers are an effective choice for photo editing in Photoshop.

1. Gaming Laptops and Computers Have Incredibly Fast Processing Speed

When you are creating art or work in graphic design, high-speed processing is necessary. The higher the processing speed, the faster the computer program responds to the input of the user. When the computer responds quickly to the user, they can get work done more quickly.

Gaming laptops are built with either Core i5, i7, or i9 processors. Core i9 processors are the latest, the fastest, the best performing, and the most expensive. Core i7 processors are the kind that are most commonly found in current computers. It is best because it has a big cache and is great for multitasking.

Core i5 processors are in a mid-level price range and can handle every basic thing you would need a laptop for from a power standpoint. This core is best for the user that wants to do a little bit of everything.

Also, most gaming laptops have 12 GB of RAM, which you can upgrade. This is important because Photoshop needs 16 GB of RAM to run. Gaming laptops clearly have enough power to run the popular photo editing app.

2. Gaming Laptops and Computers Have a Lot of Storage

Since most games need at least 20 GB of space and gamers have multiple games on their laptops or desktops, gaming computers have more storage than average. This storage capacity is ideal for image editing because you can keep multiple programs you like without worrying about losing space.

Photo editing software is pretty large, too, so a gaming pc or laptop is a sensible choice. You will also have more room to keep your past work and build a digital portfolio.

3. Gaming Laptops and Computers Have High-Quality Resolution and Graphics

Most gaming laptops have 8K resolution, providing users with an ultra-high quality viewing experience. The high resolution matters for photo editing and other types of graphic design because you can see your mistakes clearly.

Gaming laptops and PCs also have their own dedicated graphics cards, which enhance the quality of textures, shadows, and more, which can help you create better photo edits.

4. Gaming Laptops and Computers Have Long Battery Life

The long battery life of gaming laptops is a major benefit. This allows you to take your laptop on the go and create graphics anywhere and at any time. You also do not have to worry about keeping your laptop plugged in all the time. The longer battery life means you can do more in a day without worrying if your laptop will run out of battery.

5. The Keyboard and Touchpad Are Responsive

Both gaming and graphic design processes such as photo editing require the use of both a mouse and a keyboard. In order to edit photos well, you need a responsive mouse pointer that can click on small areas, but that is not too sensitive to where it highlights everything and otherwise causes a nuisance. Gaming laptops have both of these.

6. Gaming Laptops and Computers Have Highly-Effective Cooling Systems

Gaming laptops and computers are equipped with two or more fans, whereas regular laptops have one. You can even find gaming laptops with liquid cooling systems.

An excellent cooling system is essential because both computer games and graphic design programs like photoshop cause considerable heat. If that heat does not have a place to go, it can destroy your computer’s internal systems.

7. Gaming Laptops and Computers Are Durable

Gaming laptops are made with a high-quality plastic material, making them strong and resistant to scratches and other damage that computers might be prone to. They are made to last for years and provide thousands of hours of usage.

Gaming Laptop vs. Normal Laptop Overall Performance

How do gaming laptops and computers compare to the average computer? Let’s find out.

Non-gaming laptops do not have the same powerful processor, top-quality graphics card, and amount of RAM that gaming laptops do. Instead, they have the regular standard version of these components, designed to handle everyday work tasks such as word processing. Regular laptops are also more affordable, while gaming laptops are considered a high-end luxury.

Gaming laptops and computers are designed with the power to handle games and other high-power programs. Photo editing software and other creative software take a lot of energy to run, so gaming laptops are a great choice if you want to work in Photoshop for your projects.

Conclusion

Gaming computers and laptops are good for Photoshop because of their high-speed performance, excellent graphics and resolution, storage space, long battery life, and keyboard and touchpad responsiveness. They perform better than other computers on photo editing tasks because they are designed to handle games that require a significant amount of power, just like art programs and designs usually do.

If you find yourself needing a less resource-heavy editing software, consider online image editors like Placeit.net. They are hosted on the internet so they require very little resources, and can even be used on a smartphone or tablet if needed.

Are Photoshop Files Considered Vector Images?

One of the most popular and widely used graphic design applications is Adobe Photoshop TM, which allows users to edit and enhance digital images for a wide variety of applications. Photoshop is a comprehensive design platform for projects ranging from minor touch-ups to major image makeovers. But it does have its limitations, particularly when it comes to vector images.

Technically speaking, Photoshop files cannot be considered vector images because the native formatting for Photoshop files is raster, meaning that they are comprised of tiny building blocks known as pixels. Thus, while native Photoshop file images can be incredibly vibrant, they are not vectors.

Generally speaking, because Photoshop is not capable of creating original vector files, the images contained therein are not scalable and are subject to resolution deficiencies, particularly when they are resized. But there are some workarounds for these limitations; all it takes is some creativity and a bit of savviness so read on to learn how to work vector images into Photoshop files.

Are Photoshop Files Considered Vector Images?

Photoshop is the application of choice when it comes to creating, editing, and enhancing high-value images for a broad spectrum of graphic design applications on print, web, and mobile platforms. The types of image-intensive files (as indicated by the .psd extension) that can be worked on in Photoshop include:

  • Web and app designs
  • Flyers, posters, and other printed collateral
  • Videos and animations
  • 3D projects

Commonly referred to simply as PSDs, Photoshop files consist of images that are based on pixel architecture, making them raster images as opposed to vectors. There are unique attributes of Photoshop files that make this platform so popular among graphic designers and digital artists, such as:

  • A single PSD file can contain multiple editable layers, images, and objects, making it an ideal medium for creative endeavors that require manipulation of elements
  • With resolution up to 30,000 pixels in height and width, Photoshop files can be incredibly dynamic and detailed
  • PSDs are capable of storing vast amounts of data (up to 2 GB) and are therefore the ideal creative vehicle for large, complex projects involving multiple layers, images, and graphics
  • Photoshop is a particularly powerful resource for files containing photographic images with its editing, retouching, compositing, and exposure-enhancing capabilities

But despite all of its formidable tools and features, Photoshop has one glaring weakness and that is its inability to create original vector files. Fortunately, however, there are ways to work around this deficiency.

What are Vector Images Good For?

While raster files are notable for their high resolution and remarkable detail, there are instances where the use of vector images has its advantages because of their unique attributes. But to better understand the reasons for this, it is helpful to understand how raster and vector images stack up:

  • Raster files are pixel-based, meaning that they are composed of tiny colored blocks that are arranged to create an image
  • Vector files, on the other hand, are points on a grid that are precisely plotted through mathematical formulas and geometric principles

Because vector images comprise lines, curves, shapes, and coloring that are created through equations and not pixels, they are infinitely scalable. This means that an original vector image can be enlarged or shrunk down without any loss of fidelity whatsoever. In contrast, a raster image (like a PSD) will appear increasingly pixelated and grainy the more that it is enlarged beyond its original size.

Are There Ways to Use Vector Images in Photoshop Files?

From a creative standpoint, it would be advantageous to be able to use vector images in a Photoshop file because of the incredible flexibility that they afford should the need to resize them arise (for instance, if a PSD logo originally designed for a business card needs to be resized for a magazine layout or a poster).

Fortunately, there are several ways to do this in Photoshop. The first method is vectorizing an existing raster image and it involves these steps:

  • The target image must first be separated from its background and copied to a new layer
  • Using the Layer and Marquee tools the image must then be selected and highlighted
  • Next, the Make Work Path tool will be used to prepare the image for creating a Vector Mask layer
  • The Vector Mask process is what vectorizes the image, transforming it from pixel architecture to a vector-based drawing
  • This newly vectorized image can then be saved as a Photoshop EPS
  • By opening this file in Adobe Illustrator TM, the image can be scaled in any number of ways without losing any fidelity

With a little software savvy, Photoshop can be used to vectorize a raster image into a working EPS file which affords the artwork the same scalability that original vector files offer.

Another technique involves creating simple vector-based shapes directly in Photoshop using the application’s built-in drawing tools. Although these implements are far simpler and rudimentary compared to those found in Illustrator, in the right hands they can still be used to create surprisingly detailed vector images. Best of all, this can be done directly within Photoshop. Here is what is involved:

  • Photoshop’s vector-based drawing tools can be used to create basic shapes like lines, rectangles, ellipses, polygons, and free-form shapes (essentially lines connecting any number of anchor points)
  • Color can be applied to shape outlines or to fill an enclosed area
  • Shapes can be overlayed on one another or merged to create unique composites which can then be further refined through varying degrees of overlapping
  • Using Photoshop’s pen tool provides a freeform method for creating vector-based images and can even be used to trace over a raster image to transform the latter into the former
  • It is even possible to convert text (e.g., block letters or stylized text) into a vector-based drawing object, although by doing so, the text can no longer be edited since it is technically an image

Thus, whether by vectorizing an existing raster-based image, or creating a basic vector-based image from scratch, there are ways to create Photoshop files containing vector art that affords the images all the benefits of being vector-based, namely unlimited scalability.

Conclusion

When it comes to working with high-resolution raster images like photographs and complex digital art pieces, the Photoshop platform has very few, if any, peers. On the surface, it may seem that Photoshop’s one glaring deficiency is the fact that its native formatting is raster-based as opposed to vector-based.

But there are ways to vectorize raster images and even create original vector-based artwork in Photoshop, to produce PSD files that, in a manner of speaking, have the best of both the raster and vector worlds.

Are Photoshop Fonts Copyrighted? [What You Need to Know]

When you download Photoshop and purchase the annual subscription, you are essentially paying for the use of the program and all the design tools it encompasses. The subscription allows you to create graphics, designs, edit photographs, etc., for personal enjoyment or commercial use, like a website, brand marketing, a product, etc. Regardless of what is included in your subscription, you want to be aware of any licensing stipulations for copyrighted tools or graphics.

Fonts on Photoshop are copyrighted. However, you are still permitted to use the automatically downloaded fonts for personal and commercial use. With that being said, there is a restriction on the usage of Photoshop fonts.

Understanding licensing can be time-consuming and daunting when tackling legal jargon. Luckily, this article will break down what you need to know and address any gray areas that you might find confusing. Understanding licensing will allow you to have peace of mind, knowing you are using Photoshop appropriately.

How Are Photoshop Fonts Permitted to be Used?

You’ve just downloaded Photoshop and consented to a monthly or annual subscription to use the application. The terms and conditions were lengthy and perhaps confusing in the language used or redundancy. You want to know specifically about the fonts automatically downloaded with the program, and it states that they are copyrighted, so you want to know what that means for you, as the user. You also want to know about any restrictions in using Photoshop fonts.

The Photoshop fonts that come automatically with the purchase of the application can be used for personal or commercial use. Your monthly or annual subscription is a purchase of a license from Photoshop.

In other words, Photoshop owns all the rights to the fonts, but they are permitting you to use them as they dictate. The only restriction is that Photoshop fonts cannot be redistributed by any of its users.

Redistribution means that you cannot share the raw font file with anyone; this includes friends, co-workers, employers, employees, etc. Only you are permitted to use the font because you are the one who purchased the license, and the license is only good for you. However, you can share any work you have done using the font, whether PDF or another format.

The Copyright for Photoshop Font From External Vendors

Photoshop allows you to use fonts that you have downloaded from external vendors. When it comes to externally sourced fonts, the copyright rules may differ. For example, you may have found a font from a website or other program and downloaded it for free and are ready to use it in Photoshop, but the licensing of the font says it’s only free for personal use.

If you download a font that is free for personal use, it may mean that a purchase is required for commercial use. If there is no purchase option, the font can only be used for personal projects. It is important to always check the licensing of any font you downloaded from other programs or off the internet. Even if you pay for the font, that does not mean you can use it for personal and commercial use.

Also, keep in mind that when you are purchasing a font, you are purchasing a license only. That licensing could be for a single-use or multiple uses of the font; it depends on the terms. The license does not permit you to redistribute the font, even if it is externally sourced. The only way you can redistribute a font is if you have ownership, and that would require the copyright to be transferred over to you.

Personal Use Versus Commercial Use

With the fonts automatically downloaded with Photoshop, you don’t necessarily have to worry about the difference between personal and commercial use. However, if you have downloaded an external font, you will want to know the difference because some may only allow for personal use without purchase.

For Personal Use Only

Many fonts off the internet and free via other programs are only permitted for personal use. Most of the time, for it to be used commercially requires a purchase. You may not want to pay for the font, so you need to know what personal use constitutes.

Personal use means that you design or edit to keep your work primarily to yourself or share among friends or peers with no intention of gaining a profit. Personal use means that your design or graphic can not be on a website, marketing materials, a product, advertising, etc.

This licensing can get tricky because the line between personal and commercial use is so easily crossed. For example, let’s say you use Photoshop to create a funny graphic or meme, and you share it in a private group chat with your friends. They think it’s so great, one of them decides to put it on a poster and use that poster to promote an event where there is a cover charge. The design you created using a “for personal use” font is now being used commercially and violates the copyright.

For Commercial Use

The safer licensing option is for commercial use; this means you can use it on any project regardless of whether or not you turn a profit. Therefore, you can slap any design using the font on a t-shirt, flyer, ad, website, etc., and have peace of mind that you are using the font appropriately.

There are plenty of external sources, like Placeit.net, with fonts that allow for personal and commercial use. Take a look at Placeit’s license here to see commercial usage rights explained. The last thing you want is someone coming after you for copyright infringement over a font.

Conclusion

All in all, it is always the best practice to read the licensing agreement when using any tool or font on any website, application, or program, no matter how long or tedious. Knowing what you are given the right to do under the copyright ensures you will not violate the copyright and possibly be sued.

Can a MacBook Air Run Adobe Illustrator?

Adobe Illustrator is a popular program that comes in handy to make digital images and designs. If you’re the owner of a MacBook Air and want to use the program, you might wonder – can a Macbook Air run Adobe Illustrator, or is the device not compatible?

All MacBook Air models can run Adobe Illustrator, however 2020 or newer MacBook Air models will perform best due to their more powerful M1 processor chip. For the ultimate performance, consider upgrading the built-in Memory from 8GB to 16GB.

You’ve come to the right place if you want to learn more about Adobe Illustrator and the Macbook Air. Read on to learn more about how this software works on the Air, if professionals use the Air, and more. There’s a lot to cover, so let’s get started!

How Does Illustrator Work on a Macbook Air?

If you want Adobe Illustrator on your MacBook Air, you will first need to download the software. The program doesn’t come automatically on any MacBook models.

To get Adobe Illustrator on your MacBook Air, you should:

  1. Head to the Adobe website
  2. Pay for the Illustrator program or Adobe Suite
  3. Download Adobe Illustrator 
  4. Log into the software on your MacBook

You can keep the Illustrator icon hidden or put it right on your home screen dock for easy access. Now that you know how to get access to Adobe Illustrator, it’s time to discuss whether the MacBook Air is the best MacBook for Illustrator?

Which MacBook is Best for Illustrator?

There are many MacBook varieties on the market. Some are equipped with more powerful hardware than the MacBook Air, however is all the added power necessary to run Illustrator?

Although Illustrator will run on any year MacBook Air, 2020 or newer MacBook Air models are best to run Illustrator because they come with the M1 processor chip.

The M1 processor chip is a lot faster than the previous processors, so you’ll have a more enjoyable experience using Illustrator.

If you plan to use Adobe Illustrator more frequently, you may want to consider upgrading the 8GB of built-in Memory to 16GB.

The upgraded Memory will keep Illustrator running fast as you create more complex design projects. Typically, the program can get “bogged down” and take more loading time if you run out of Memory. Although 8GB of Memory is sufficient, you will have much more peace of mind with 16GB Memory if you find yourself using the computer for other uses as well.

MacBook Air vs MacBook Pro for Adobe Illustrator

Although the MacBook Air is less powerful than the MacBook Pro, it’s also less expensive by hundreds of dollars. The MacBook Air is a solid option if you want to make Adobe Illustrator a part of your life, especially if you’re buying a 2020 or newer model with the M1 chip.

A 2020 or newer MacBook Air will perform nearly identical to the MacBook Pro when it comes to running Adobe Illustrator.

It is not necessary to upgrade computers from MacBook Air to MacBook Pro in regards to using Illustrator.

Do Professionals Use MacBook Airs?

Because MacBook Airs are so powerful nowadays, there are plenty of professionals that utilize MacBook Airs for professional purposes. Illustrators and graphic designers enjoy the portability of the MacBook Air, along with the storage space it provides. You can absolutely use the MacBook Air, whether you work from home or in an office.

In the past, professionals were more likely to opt for the MacBook Pro because it was more powerful, however the 2020 and newer models of the MacBook Air harness the same M1 processor chip that makes it just as powerful.

Is Illustrator Free on the MacBook Air?

Although free software would be ideal, Adobe Illustrator is not free on the MacBook Air. It’s not free on any Apple device, whether you’re investing in the Air or the more expensive MacBook Pro. If you want to illustrate, you need to be ready to pay a monthly fee for the luxury of the Adobe service.

If you want Adobe Illustrator, you can invest in the following account options:

  • A free trial: If you don’t want to pay, you can take advantage of a free 30-day trial of the service. Once it ends, you can determine if the service is right for you.
  • A basic subscription: A subscription for Adobe Illustrator will run you around $20.99 a month.
  • A student account: If you’re a student, you can get up to 60% off the base price for the service. Once you leave school, you will have to upgrade to the traditional cost.

These offer variety in what you pay for Adobe Illustrator, allowing you to determine what you are willing to pay for the features.

It would be ideal if Adobe Illustrator was free on the MacBook Air, but it’s the industry standard for many professions. You need to be ready to pay at least $20 a month for Adobe Illustrator on this device if you want it available to access whenever you need it.

Are There Illustrator Alternatives for the MacBook Air?

If you’ve decided Adobe Illustrator isn’t the best choice for you, there are several alternatives you can pick from on a MacBook Air. Let’s go over some of the most ideal affordable selections if you want to try out something else.

A few of the best alternatives for Adobe Illustrator on the MacBook Air include the following:

  • Placeit (my personal favorite)
  • Inkscape
  • Gravit Designer
  • Vecteezy

These will give you similar tools for a lower price.

Many of these choices even have free options available for users. You can test out a few and determine if there’s anything you like more than Adobe Illustrator. Of course, if you realize Adobe Illustrator is still your best option, you can always go back to the classic choice. The MacBook Air can handle it.

Conclusion

If you have a MacBook Air and want to run Adobe Illustrator, you can feel comfortable knowing the device can handle the software. MacBook Airs are now so powerful that you can easily use them for Illustrator professionally. The 2020 or newer MacBook Air models are going to be the best choice because they have the M1 processor chip, making them more powerful than ever. For the ultimate performance, consider upgrading the built-in Memory to 16GB to power through complex design projects with the same lightning fast speed.

If you find yourself needing a less resource-heavy editing software, consider online image editors like Placeit.net. They are hosted on the internet so they require very little resources, and can even be used on a smartphone or tablet if needed.

Do Twitch Emotes Have to Be Original?

If you watch Twitch, you know how important emote culture is to the platform. They’re a way of showing emotion, building community, and expressing yourself. However, some Twitch streamers are beginning to wonder if emotes have to be original.

Twitch has an official policy on copyright infringement, which states: “We do not permit content that violates copyright laws or regulations to be distributed through our service” (Twitch DMCA & Copyright FAQ). This means that the use of copyrighted emotes is a violation of Twitch’s Terms of Service.

Shouldn’t it just be about being creative and having fun? In this blog post, we explore what makes an original emote and why it’s important for people who want to make a living off of their streaming activity.

What Makes an Original Emote?

Many streamers have been asking themselves this question. What makes an original Twitch emote? Is it the fact that it’s using copyrighted material? Or is it because the emotes are not about a person but about an object or event?

A good example of an original Twitch emotes is the classic “lmao,” which has been used by many streamers. It was originally used to express laughter on a chat channel called LOL. This emote was then used by many streamers and became so popular that it was added to Twitch’s list of official emotes.

The problem with this is that LOL has copyright protection (LOL). This means that if you use LOL in your emote or channel artwork, you can be sued by the company that owns LOL. That’s a lot of money! The same thing happens with other emotes such as “lolololol” and “roflcopter.”

Some streamers have even been sued for using these emotes in their artwork. If you’re wondering how someone is able to sue someone for using a copyrighted emote, it’s actually quite complicated. Basically, the copyright holder of an object or event can claim that the emote or artwork infringes on their copyright and seek money damages. This is called a “copyright infringement claim.”

Why Do Emotes Matter?

Let’s start with why emotes matter to the people who make a living off of them. Emotes are an important way for streamers to connect with their audience and build community. They also serve as a way to express emotions while they watch their favorite content. Streamers spend hours streaming, but an emote a quick reminder that they’re there and feeling everything.

Emotes also represent the personality of your streamer and help build trust with your viewers. Emotes are an extension of yourself, so if you want people to trust you and follow you, your emotes need to show that you mean what you say.

Finally, one of the most important reasons why emotes matter is because they make it easier for viewers to understand what’s happening in your stream without having to read text or listen carefully.

When people see a reaction from their favorite streamer, it tells them what’s going on whether they have time or not. The same goes for when someone rewatches your broadcast later on or watches another streamer use the same emote during a game.

Is It Ever Okay to Use Copyrighted Content in Your Emote?

You can use copyrighted content in your emote, but you should make sure to credit the owner of the work whenever possible. When it comes to emotes, there are two important questions to consider:

  1. Do you need to be original?
  2. Is it ever okay to use copyrighted content in your emote?

If you want your content to stand out and be remembered by Twitch viewers, then creating an original emote is a must. This allows for the chance for people to see it as a personal expression that isn’t about someone else’s copyrighted content.

For example, if you were watching a streamer who was playing Fortnite, you might create an emote with the Fortnite logo on it. It shows that you’re watching their stream and that they’re a part of your community.

Conclusion

It’s easy to get caught up in the idea that it’s right to create your own emote, but a lot of people don’t realize that emote design is a competitive field. You don’t want to be the guy who steals someone else’s design and claims it as your own.

Consider using a Twitch emote maker to create your own custom Twitch emotes, and enjoy the peace of mind that comes with knowing you will never be sued for using it.

The other reason is that stealing someone else’s content is never okay. There are many things that you can use for your Twitch emotes, but it’s always better to find something that is unique and original.